Hello,
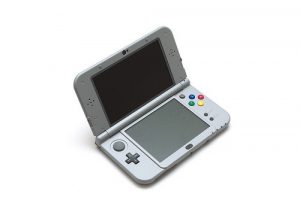
This post is for people who have a significant quantity of data on their old ds and want to transfer it to their new ds system. Regrettably, the New Nintendo uses a MicroSD Card and the 3ds uses a SDHD card which is roughly five times bigger. Apparently, you can’t attempt to fit an SDHD card into a MicroSD card because it won’t fit!
Fortunately, Nintendo lets you transfer your data in two different ways. A wireless transfer which can be a full or limited transfer and a PC transfer. For the wireless transfer, you have two options. You can perform a full or limited transfer that just transfers your previous bought games such like, DSIware, ( an application store on the Nintendo DSI that uses its own points, ) or currency bought games from the “Nintendo E Shop.”
A PC transformation requires a current computer like the Windows 7 that has slots for both the SDHD and Micro SDHD card. It will overwrite all the data making it possible to the data to the MicroSD card.

Here is how to do A wireless transfer
FYI for the instructions: s is for the source system, (your old 3ds,) and t is for your target system, (your New Nintendo 3ds.)” Also, this is in order that the icons and messages will pop up.
Precautions and WARNINGS
- Make sure that both systems are equipped with maximal battery power. ( Full Data Transfers may take two- four hours and can absorb a lot of battery power.)
- Make sure they are connected to a strong Wireless local area network source. (If not or Wifi signal is lost, all data may have a strong risk of being permanently lost in the process.)
- In case one of these occur and you have done so before performing it: Overwrite all the data on a computer just in case a error occurs or you run out of power.
Instructions
1s. On the source system, go to the main menu and tap the System Settings Icon and then “Open.”
2s. Tap “Other Settings.”
3s. Go to the third row of settings and you should find on that says “System Trasnfer.” Click that.
4s. Tap the icon that says “Transfer from a System in the Nintendo 3DS Family.”
5s. Read the information about the transfer and tap “Agree.”
Tap “Send from This System.”
(optional) If you have a Nintendo Network ID press “Next” and use the on-screen keyboard to enter your Nintendo Network ID password.
1t. Do the same steps for 1 and 2 as they are the same
2t. Go to the forth set of settings and then click “System Transfer.”
3t. Tap “Transfer from Nintendo 3DS.”
4t. Agree and read the information about the transfer
5t. Amounts of transfers will display. Tap “Yes” to initiate the transfer.
6t. Tap “Receive from Nintendo 3DS.”
Source System
6s. Select the system that will receive the transfer.
Target System
7t. Tap “Yes” to accept the transfer.
Source System
7s. Read the transfer information and tap “Next” to continue.
8s. Tap “Yes” to confirm.
9s. If there is duplicate data on the systems, read what will be deleted and then tap “Next.”
10s. A message may appear stating that some software will become unstable. Tap “Yes” to confirm.
11s. Tap the blue “Transfer” button to continue.
(Optional): If the system has Nintendo DSiWare titles, select “Move” to move the titles to system memory.
12s. Read the information about SD Cards and then select “Next,” and then select “Next” again.
13s. Select “Wireless Transfer.”
14s. Select “Move” when you are ready to initialize the transfer process. As this process may take over 4 hours to complete, it is important that you monitor the battery levels of both systems. If one is low on power, plug it in.
15s. At this point, the Pikmin movie will play. When the transfer is done, the movie will end. Select “OK” on both systems.

Bye and Happy Late New Years